How to organize objects with groups
Create groups to organize and manage collections of objects in Infrahub. Groups enable bulk operations, access control, and logical organization of your infrastructure data.
Prerequisites
Before starting this guide, ensure you have:
- Access to an Infrahub instance
- Objects already created that you want to group (for example, tags, devices, or locations)
- Appropriate permissions to create and modify groups
Step 1: Create a new group
Choose your preferred method to create a group:
- Web Interface
- GraphQL
- Python SDK
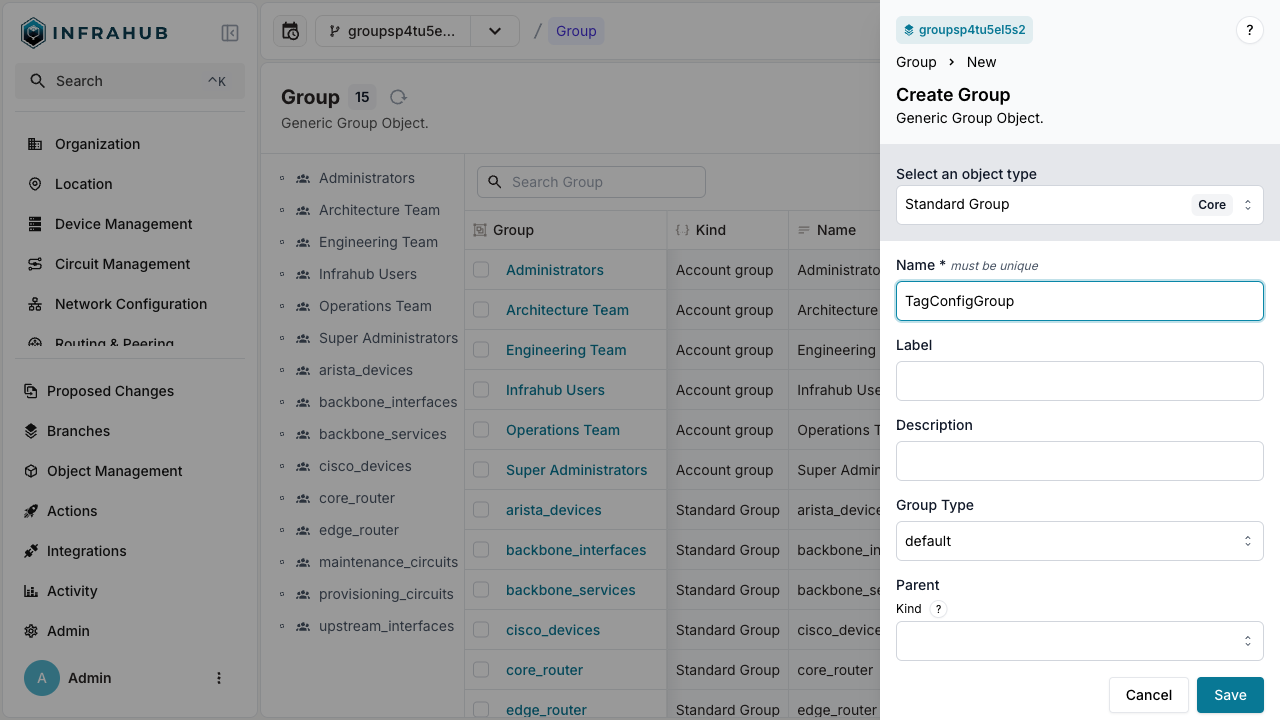
Navigate to Object Management → Groups in the left menu.
Click New Group and provide:
- Group name (for example,
TagConfigGroup) - Optional description
- Group type (Standard or other available types)
Open the GraphQL interface at http://localhost:8000/graphql.
Execute this mutation to create a Standard Group:
mutation CreateGroup {
  CoreStandardGroupCreate (data: {name: {value: "TagConfigGroup"}}) {
    ok
    object {
      hfid
    }
  }
}
Save the returned hfid value - you'll need it for adding members.
from infrahub_sdk import InfrahubClientSync

client = InfrahubClientSync(address="http://localhost:8000")

# Create a new group
group = client.create(
    kind="CoreStandardGroup",
    name="TagConfigGroup"
)
group.save()
Step 2: Add members to the group
Add objects as members of your newly created group:
- Web Interface
- GraphQL
- Python SDK
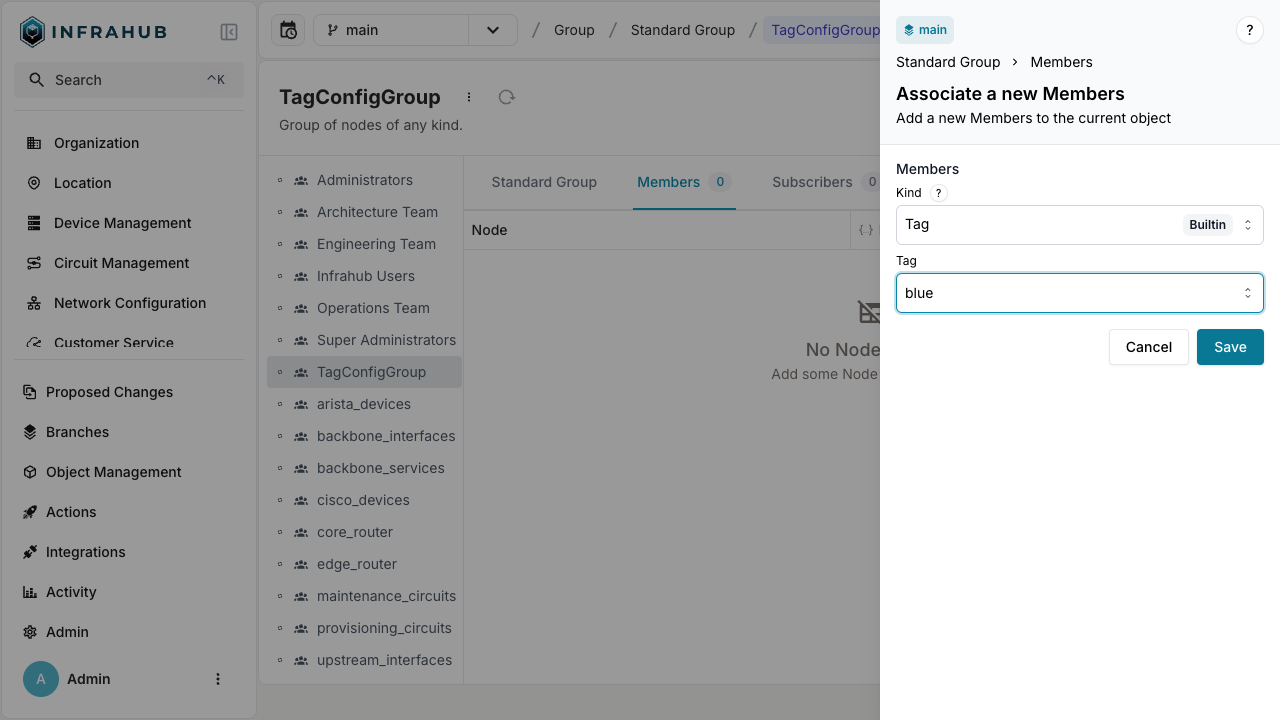
- Select your group from the Groups list
- Navigate to the Members tab
- Click Add Members
- Select the objects to include (for example,
redandbluetags) - Click Save
First, retrieve the IDs of objects you want to add:
query {
  BuiltinTag (name__values: ["red","blue"]) {
    edges {
      node {
        id
        display_label
      }
    }
  }
}
Then add these objects to your group:
mutation UpdateGroupMembers {
  CoreStandardGroupUpdate(
    data: {
      hfid: ["<HFID returned by CreateGroup mutation>"],
      members: [
        {id: "<id of red tag>"},
        {id: "<id of blue tag>"}
      ]
    }
  ) {
    ok
  }
}
# Retrieve the group
group = client.get(kind="CoreStandardGroup", name__value="TagConfigGroup")

# Get the objects to add
red_tag = client.get(kind="BuiltinTag", name__value="red")
blue_tag = client.get(kind="BuiltinTag", name__value="blue")

# Add members to the group
group.members.add(red_tag)
group.members.add(blue_tag)
group.save()
Step 3: Verify group membership
Confirm that your objects have been successfully added to the group:
- Web Interface
- GraphQL
- Python SDK
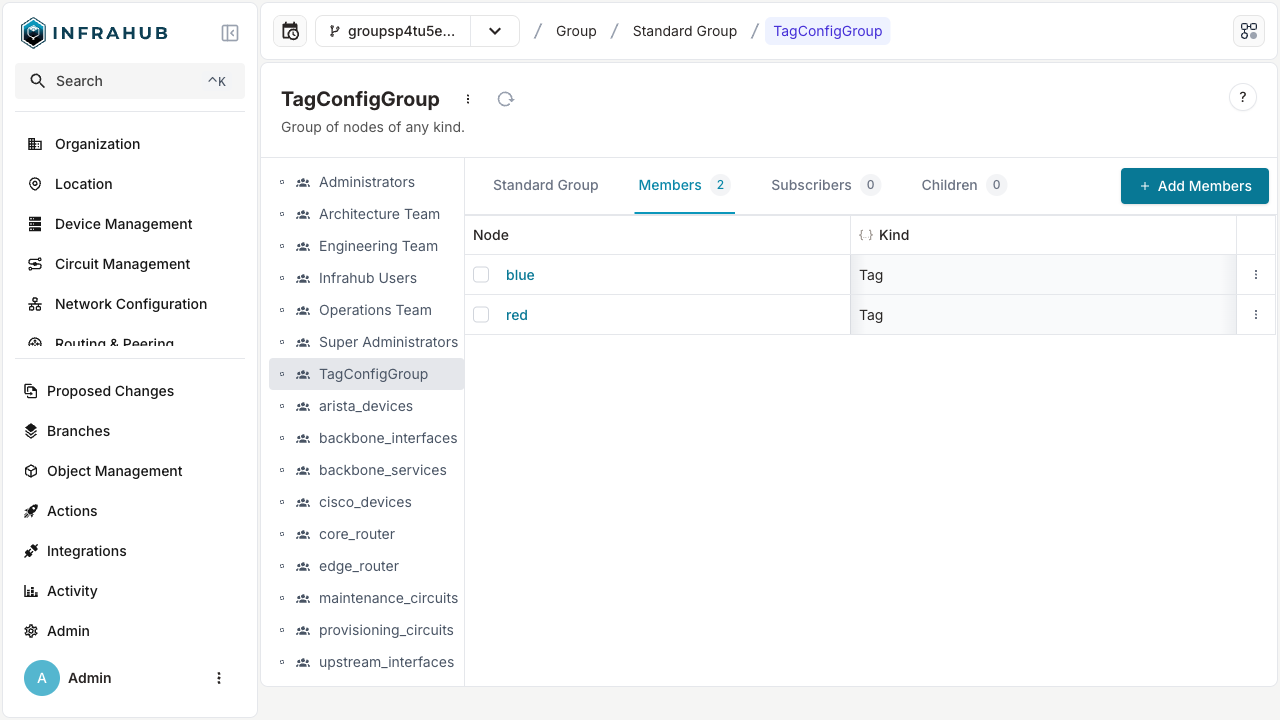
- Navigate to Object Management → Groups
- Select your group (
TagConfigGroup) - Click the Members tab
- Verify all expected objects appear in the list
Query the group to see its members:
query {
  CoreStandardGroup(name__value: "TagConfigGroup") {
    edges {
      node {
        name {
          value
        }
        members {
          edges {
            node {
              display_label
            }
          }
        }
      }
    }
  }
}
# Retrieve and check group members
group = client.get(kind="CoreStandardGroup", name__value="TagConfigGroup")
members = group.members.get()

for member in members:
    print(f"Member: {member.display_label}")
  </TabItem>
</Tabs>

## Validation

Confirm your group is working correctly:

- ✓ Group appears in the Groups list
- ✓ All intended members are visible in the Members tab
- ✓ Group can be referenced in queries and operations
- ✓ Members inherit any group-level configurations

## Common operations with groups

### Remove members from a group

<Tabs>
  <TabItem value="web" label="Web Interface" default>

1. Navigate to your group's Members tab
2. Select the members to remove
3. Click **Remove from Group**

  </TabItem>

  <TabItem value="graphql" label="GraphQL">

Update the group with a new member list excluding the objects to remove:

```graphql
mutation RemoveGroupMembers {
  CoreStandardGroupUpdate(
    data: {
      hfid: ["TagConfigGroup"],
      members: [
        {id: "<id of remaining member>"}
      ]
    }
  ) {
    ok
  }
}
Delete a group
- Web Interface
- GraphQL
- Select the group from the Groups list
- Click the Delete button
- Confirm the deletion
mutation DeleteGroup {
  CoreStandardGroupDelete(
    data: {
      hfid: ["TagConfigGroup"]
    }
  ) {
    ok
  }
}
Troubleshooting
If members aren't appearing in your group:
- Verify the object IDs are correct
- Check that objects exist and aren't deleted
- Ensure you have permission to modify both the group and its members
- Confirm the save/update operation completed successfully
If groups aren't visible:
- Check your user permissions for group management
- Verify the group was created in the correct namespace
- Refresh the interface or clear browser cache